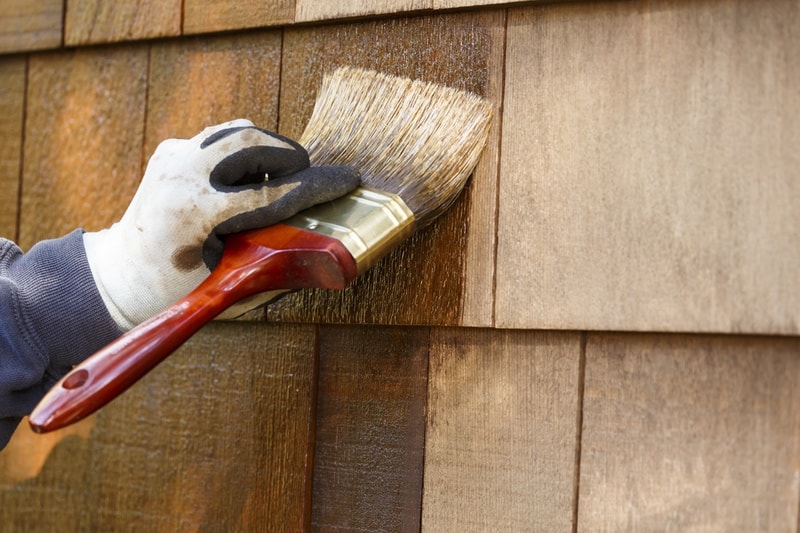
Painting over mold might seem like an easy fix. But it won’t kill it. It only hides it temporarily. And when mold is left untreated, it finds its way back through bubbling paint, stains, and surface rot.
This blog will help you avoid the five most common mistakes homeowners make when tackling moldy exteriors before painting. Whether you’re a seasoned DIYer or a weekend warrior, this is your go-to guide for protecting your investment—and your peace of mind.
Why Mold and Paint Don’t Mix

Let’s be clear: mold and paint don’t get along. At all.
Here’s why it wrecks paint performance:
-
Adhesion failure – Creates a barrier that prevents paint from properly bonding with the surface.
-
Bubbling, peeling, or cracking – Moisture and active spores disrupt the paint film, leading to premature breakdown.
-
Persistent discoloration – Mold stains often bleed back through paint, especially lighter colors, even after multiple coats.
And it’s not just an aesthetic problem.
There are real health and structural risks:
-
Spores spread under paint and can worsen allergies or respiratory issues.
-
Moisture trapped under paint creates the perfect conditions for rot, especially on wooden surfaces.
-
Ignored mold can mask bigger problems like leaky gutters, drainage issues, or damaged caulking.
Many homeowners underestimate how resilient it is. A quick spray and rinse may seem like enough, but mold is stubborn—it roots into surfaces, especially porous ones like wood or fiber cement siding.
It isn’t just surface-level. It’s a survivalist. And if you don’t treat it properly, it won’t just ruin your paint—it’ll keep coming back.
Mistake #1: Skipping the Identification Step
You might think: “If it’s dark and patchy, it’s probably dirt, right?”
Not always.
What most homeowners do:
-
See dark streaks or fuzzy patches and assume it’s dirt or minor mildew.
-
Skip inspection and go straight to power washing.
-
Paint right over it thinking the paint will “seal it in.”
Here’s why that’s a big mistake.
Mold ≠ Mildew ≠ Algae
-
Mold is usually black, green, or brown and has a musty smell.
-
Mildew tends to be gray or white and powdery.
-
Algae is often green and slimy—common near sprinklers or shaded areas.
Each type of growth responds differently to cleaning methods.
Power washing without identifying the issue can actually spread mold spores and drive moisture deeper into siding—especially if you’ve got older wood, stucco, or fiber cement.
You may clear the surface visually, but you’ve just planted the problem deeper.
What to do instead:
-
Inspect key areas: north-facing walls, under eaves, behind downspouts, window trims, porch ceilings.
-
Use your nose: mold has a distinctive musty, earthy smell.
-
Try a mold test swab (available at most home improvement stores) or a moisture meter to detect hidden dampness.
-
Document: Take clear photos of questionable areas. You can reference these if you decide to bring in a pro.
Knowing what you’re dealing with is step one. Skip it, and you’re just guessing—at the risk of repainting again in a year.
Mistake #2: Using the Wrong Cleaning Solution

Bleach is the go-to for a lot of homeowners. It’s cheap. It’s familiar. And it seems like it works.
But here’s the truth: bleach doesn’t kill mold at the root—especially on porous surfaces like wood, stucco, or older siding.
Common DIY cleaning mistakes:
-
Spraying undiluted bleach directly onto siding.
-
Mixing homemade cleaning solutions found on social media without checking for compatibility.
-
Using cleaners without testing on a small area first.
-
Forgetting to protect plants, pets, and soil.
Why bleach isn’t the magic bullet:
-
It evaporates too quickly to penetrate mold roots.
-
It can damage paint, vinyl, aluminum, and surrounding greenery.
-
It may leave behind a residue that interferes with paint adhesion.
Better cleaning alternatives:
-
White vinegar + water: Mild but effective against light mold. Eco-friendly and safe around plants.
-
Oxygen bleach (sodium percarbonate): Great for tougher mold, safe on most siding, and less toxic than chlorine bleach.
-
Commercial mold removers: Look for EPA-registered solutions labeled “paint prep safe” and “non-corrosive.”
Pro tip: Always wear gloves, goggles, and an N95 mask when cleaning moldy surfaces. Protect your lungs and skin—even with gentler cleaners.
Before using any product, test it in a small hidden spot and rinse thoroughly. A good cleaner should kill mold without degrading your siding or interfering with the paint’s ability to adhere.
Mistake #3: Failing to Scrub and Rinse Properly
Spray and walk away?
Tempting. But if you skip scrubbing and rinsing, your “clean” surface might still be a breeding ground for mold.
What many DIYers do wrong:
-
Apply cleaner and assume it works instantly.
-
Don’t scrub at all.
-
Rinse too soon or not at all.
-
Rely solely on a pressure washer.
Here’s the issue: mold embeds itself into the tiny pores and grooves of siding, wood, and trim. Surface spray doesn’t cut it.
Get it right with this simple process:
-
Pre-wet the surface to reduce absorption of cleaner.
-
Apply your chosen mold cleaner with a sprayer or sponge.
-
Let it sit for 10–15 minutes. This dwell time is crucial.
-
Scrub gently with a soft-bristle brush to loosen mold and lift spores.
-
Rinse thoroughly with a garden hose — not a pressure washer (which can drive spores deeper and damage siding).
-
Repeat as needed for stubborn spots.
Why this matters:
-
Incomplete cleaning = compromised adhesion = paint failure.
-
Mold that’s merely bleached but not removed will come back.
-
Leftover residue from cleaners can also prevent primer and paint from sticking properly.
Don’t rush this step. It may feel tedious, but it’s one of the most critical parts of painting prep. Scrubbing and rinsing give you a truly clean slate — the only surface paint really wants to stick to.
Mistake #4: Painting Before the Surface is Fully Dry

This is one of the most common, and costly, mistakes.
It’s easy to underestimate just how long it takes for a cleaned exterior surface to dry—especially in humid or shady conditions.
What most DIYers do:
-
Clean in the morning, start painting by afternoon.
-
Feel the surface and think “it’s dry enough.”
-
Forget to account for weather, shade, or the porosity of materials.
Why this backfires:
-
Moisture trapped under paint causes bubbling, blistering, and eventual peeling.
-
Paint may look good for a few weeks, but problems show up months later.
-
Trapped moisture can lock in spores or feed future mold growth.
Best drying practices:
-
Allow 24–48 hours of dry time, depending on temperature and humidity.
-
Use a moisture meter: readings under 15% are generally safe for painting.
-
Prime any bare or sanded areas with a mildew-resistant primer before applying exterior paint.
If the surface isn’t completely dry, don’t paint. A little patience here saves you hundreds—maybe thousands—on future repairs.
Mistake #5: Not Addressing the Underlying Cause
Cleaning mold is only half the battle. If you don’t fix what caused it in the first place, it’s coming back.
Most homeowners don’t realize:
-
That shady side of the house? It’s always damp because of poor airflow.
-
The bubbling paint on the bottom trim? It’s right beneath a leaking gutter.
-
The mold on the porch ceiling? It’s from water intrusion near a window upstairs.
The result?
You clean and paint…and a few months later, the mold is back. The cycle starts again.
To fix the root cause:
-
Reroute sprinklers that hit your siding or foundation.
-
Clean and repair gutters to direct water away from walls.
-
Trim back shrubs or trees that create damp, shaded areas.
-
Inspect caulking around windows, doors, and seams.
-
Check for attic or crawlspace leaks—they often cause mold in walls and ceilings.
And if you live in a damp or humid area, use mold-resistant primer and paint. Many high-quality exterior paints now include mildewcides built-in.
Stop the source, and you stop the cycle.
When It’s Time to Call in the Pros
Some homeowners can handle mold cleaning carefully and effectively. If that’s you, great.
But if mold keeps coming back, spreads across multiple surfaces, or shows up in hard-to-reach spots, it’s time to reconsider. Visible damage—like warped wood or crumbling stucco—is another red flag. And if anyone in your home has allergies, asthma, or immune concerns, professional help is the safer choice.
A good pro brings experience, the right tools, and a process that works. They use industrial-grade cleaners that kill mold without harming surfaces. They contain spores, clean thoroughly, and prep everything correctly—seal, prime, and dry.
Many also offer warranties, giving you extra peace of mind. Pros work faster, safer, and more thoroughly—saving time and avoiding repeat issues.
Conclusion: Prep It Right, Paint It Once
Mold might be stealthy, but now you’re smarter than it.
By learning what to look for—and what to avoid—you’ve given yourself the best shot at a paint job that not only looks stunning but lasts. No peeling. No bubbling. No creeping stains or strange smells a few months later.
Remember: skipping steps might feel like a shortcut, but when it comes to mold, the only way out is through. Proper prep isn’t a bonus—it’s the foundation of success.


